How To Add Custom Fonts To WordPress
There are thousands of fonts available online. Some of them are free and some of them are premium ones that you need to buy or pay a licensing fee to use, but the big question is “How to add custom fonts to WordPress?” In this article, we teach you how to add different fonts to your WordPress through functions.php and style.css as well as how to do it through Elementor.
What you’ll learn in this tutorial
Where to find custom fonts for WordPress?
There are several different places to find fonts including Adobes fonts library, Google Fonts, and many more places that offer fonts with licenses. For this example, we will be using Google Fonts, because Google offers them for free.
To access Google Fonts you can click here.
Note – Remember that fonts are copyrighted. For example, you can’t use the same font Netflix uses on their site or logo because it’s developed by Netflix for their own use and they have the copyright for it.
How to install new fonts to WordPress
To add a new font to your WordPress you either need to add it through your styles.css file or through a plugin. To get you started let’s see how adding a new font would go with Google fonts and the style.css file.
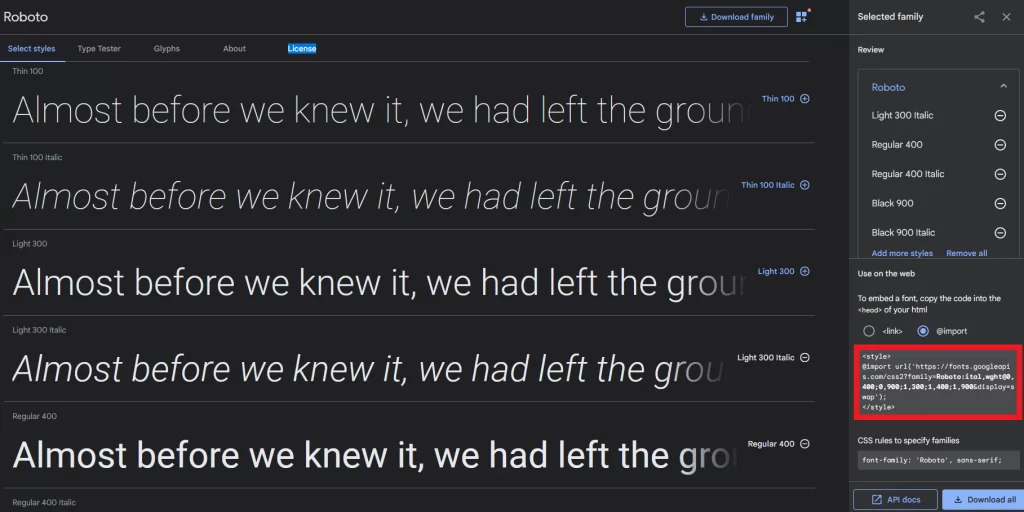
1. Go to Google Fonts and pick a font(s) you like.
Click here to go to Google Fonts and pick a font or fonts you like by clicking the “Plus” button. Remember that you don’t have to select all the styles and it is recommended that you only pick those that you need to keep the import as optimized as possible. In our example, you can see that we have added five variations of the Roboto font.

2. Select “import” from the Google Fonts sidebar
After adding all the fonts you would like to import to your site, select “@import” from the side menu.

3. Copy the import code to your style.css
After selecting “@import” select the code starting from “@import url” and paste it into your style.css so you can start using the newly imported fonts. You should paste the code at the beginning of your style.css so the fonts get imported soon as possible once the file is loaded.
Note – Remember that you need to have a child theme or you risk losing these changes when your theme gets updated!
4. Use the new font-family
To use the new font family simply paste it to the CSS class you wish to use it for. For example:
.my-custom-css-class {
    font-family: 'Roboto', sans-serif;
    font-weight: 900;
}
This code would apply the new “Roboto” font to all HTML elements that use CSS-class “my-custom-css-class“.
How to add new fonts in Elementor
If you wish to add new fonts to Elementor for example Adobe TypeKit fonts, simply head on to your Elementor > Settings > Integrations and scroll down to Adobe Fonts (TypeKit). Here, paste your “Project ID” and press the “Get Project ID” and that’s it. You can now use the fonts from your Adobe Fonts as you would with any other fonts in your Elementor.
How to add custom fonts to WordPress with a plugin
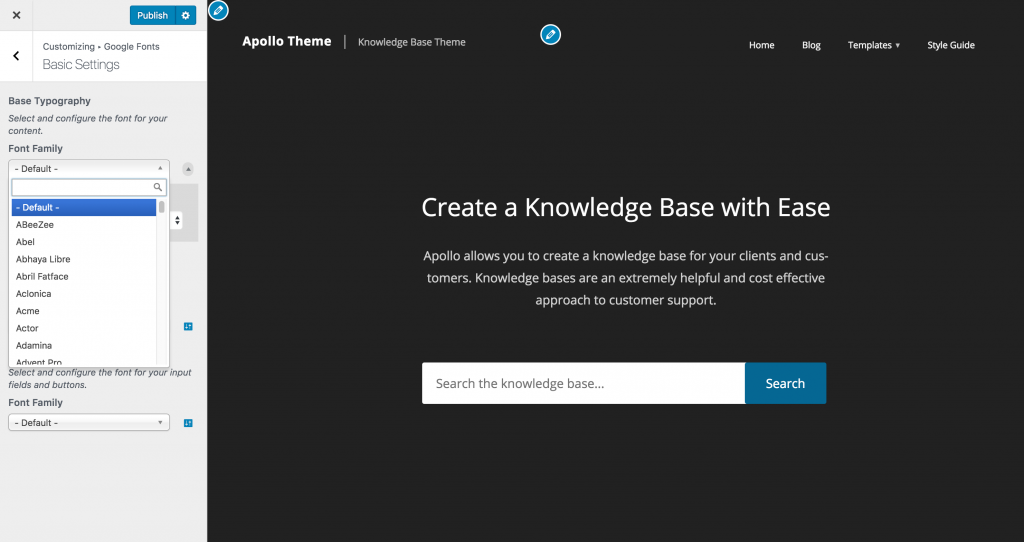
If you are not familiar with coding or CSS you can easily add Google Fonts and test them out by using a plugin. For this, we recommend the Fonts Plugin, which works with almost all themes available out there and lets you easily add Google and Adobe fonts to your theme. You can test and edit these fonts in your WordPress “Customize” menu.
Note – Some features are locked behind a premium version of the plugin which you are required to purchase if you wish to edit them through the plugin. For example you can’t host the fonts locally unless you buy the premium version of the plugin.